Unified Backup Solution - How To and Common Errors

General Errors
1- Cannot locate specified files
You have successfully installed and configured UBS. For the first plan you've included system volumes and network shares. Plan execution fails with the following message: “Cannot locate the specified file(s) or folder(s): \unc-path or local path”
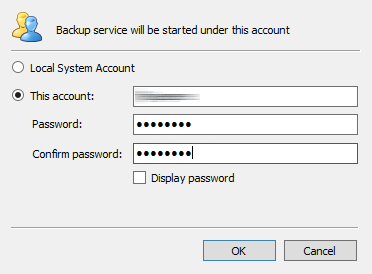
By default UBS service is run under the Local system account. Sometimes that account has insufficient permissions to access certain files and folders within your environment (i.e. networks shares, others owners folders and files). Changing the service account can be done either manually in the services (services.msc) or via UBS GUI.
Under Tools , click Change Service Account.

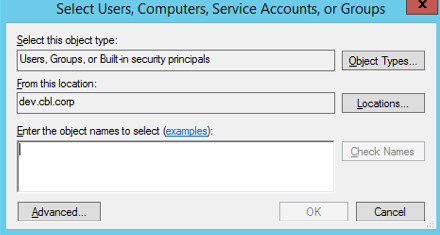
Enter your user's credentials (ensure it has required rights to your data source):
2- Back Up EFS-encrypted Objects Using SYSTEM Account
Solution 1
If Windows native encryption (EFS) is used, follow these recommendations. Note that Backup service account might be running under another account, not .\SYSTEM.
If a third-party encryption (for example, application internal encryption) is used, files must be decrypted first.
Reference articles:
- The Encyption File System: https://docs.microsoft.com/en-us/previous-versions/tn-archive/cc700811(v=technet.10)
- How EFS works https://docs.microsoft.com/en-us/previous-versions/windows/it-pro/windows-2000-server/cc962103(v=technet.10)
Backup Service account does not have enough privileges to read files
To fix this issue, proceed as follows
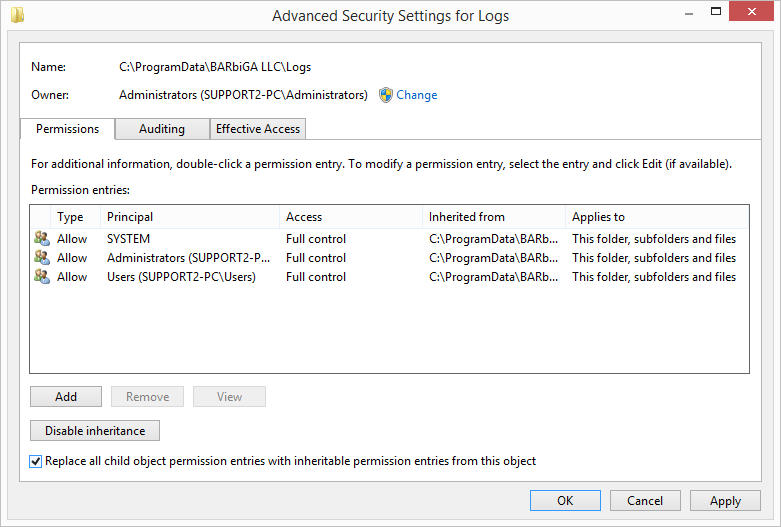
- Navigate to the parent folder of the object with an access error.
- Right-click, then select Properties.
- Switch to Security tab, then click Advanced.
- Make sure the folder with an access error has an owner, even if it is not Backup service account.
- Apply Full Control permissions for the folder with an access error for Backup service account.
- Select Replace all child object permission entries with inheritable permission entries for this object check box.
- Click Apply.
Solution 2
| Description | Value |
|---|---|
| Issue ID | 01602 |
| Issue Class | Error |
Some files on the backup source may be encrypted with EFS. To learn more about this Windows feature, refer to the File Encryption article.
The issue can be solved using the SYSTEM account which accesses EFS-encrypted files. By default, the SYSTEM account does not have an EFS certificate.
Note that allowing SYSTEM account to access EFS-encrypted files can be dangerous, since anyone with access to instance with the SYSTEM account open, is able to decrypt sensitive data
To Grant SYSTEM Account Access to EFS-encrypted Files
- Make sure you have a PsExec tool installed.
- In case you do not have PsExec, download the PSTools.zip from Mircosoft Sysinternals website, unpack it and copy the PsExec to the executable path. To learn more, refer to the PsExec 2.2 article at docs.microsoft.com.
- Run cmd utility as an administrator.
- Run PsExec using the following command: psexec -i -s -d.

- Create a scratch file. To do this, type echo. > scratch.txt.

- Encrypt the scratch.txt file using the following command: cipher /e scratch.txt.
- EFS certificates can be managed in the Certificates MMC snap-in. To learn more about MMC sdnap-in, refer to the How to: View certificates with the MMC snap-in article at docs.microsoft.com.
- Alternatively, run certlm.msc.

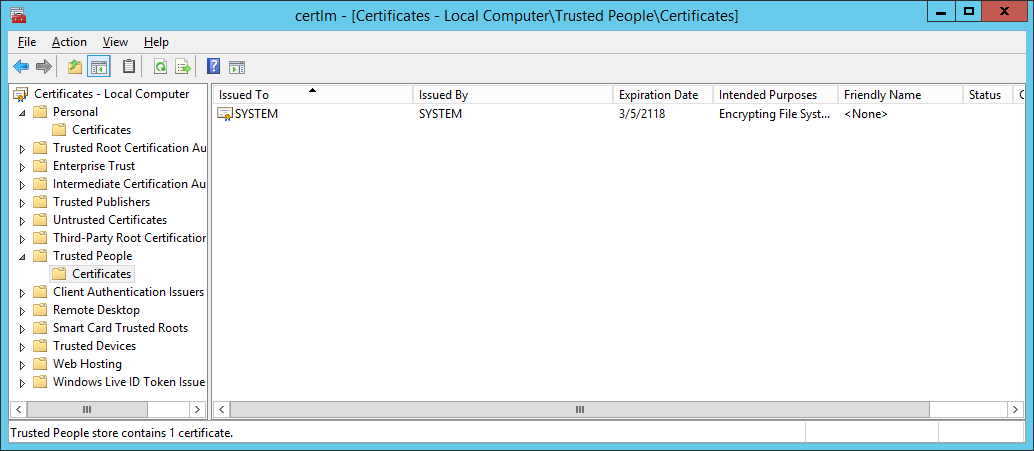
- Run a command prompt as a file owner.
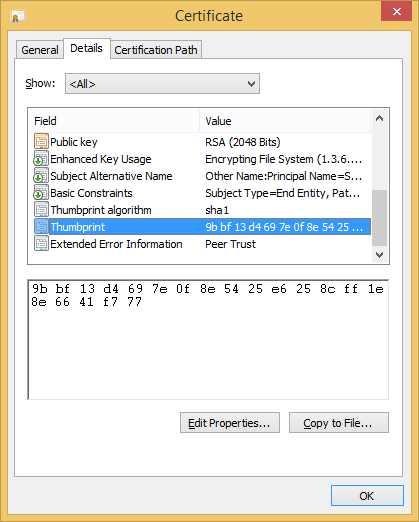
- Run cipher /adduser /certhash: with the target user's EFS thumbprint smushed against the colon without spaces. (Double-click an entry in the Certificates MMC window, then switch to the Details tab to see the thumbprint.)

- The target filename is an additional parameter, and
/s:<dir>still works if you're applying this to a folder
- Once you are done, run the backup plan again.
3 - The specified path and/or filename are too long
During the data upload you may see an error “The specified path, file name, or both are too long” or “The maximum file name limit or path length is exceeded”.
Here you can find the limits for the entire path- and file-names for all operating systems supported by UBS
| Limit for | Windows | macOS / Linux |
|---|---|---|
| Entire path | 4096 bytes | Unlimited |
| Filename | 255 bytes | 255 bytes |
For some cloud storage providers the entire path and/or file names length might be limited individually (as is the case with Microsoft OneDrive).
- Start a command prompt (no admin privileges needed)
- Use cd to navigate to the folder you want to go (you can use tab to autocomplete names)

- Type " subst j: . " to create the driveletter association. (instead of the . you can also type the entire path)

- Now in Explorer, you have a new drive letter J: in This PC.
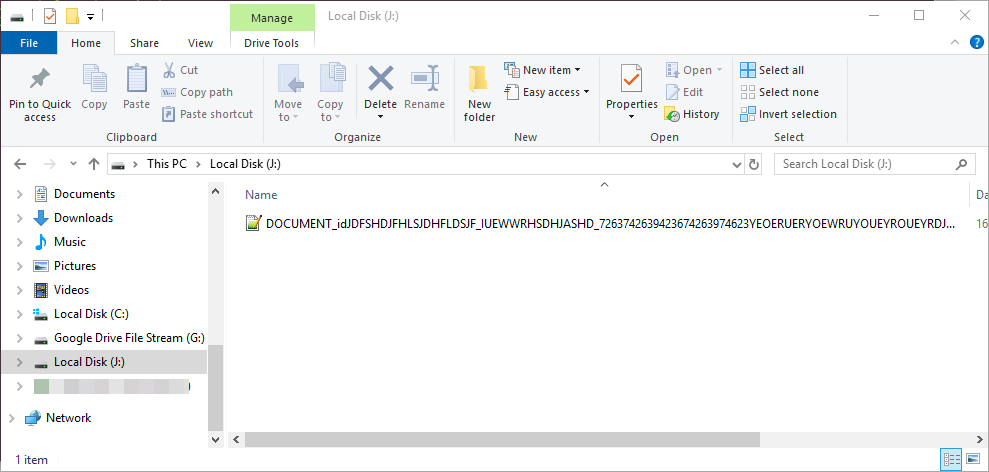
- Rename the files.
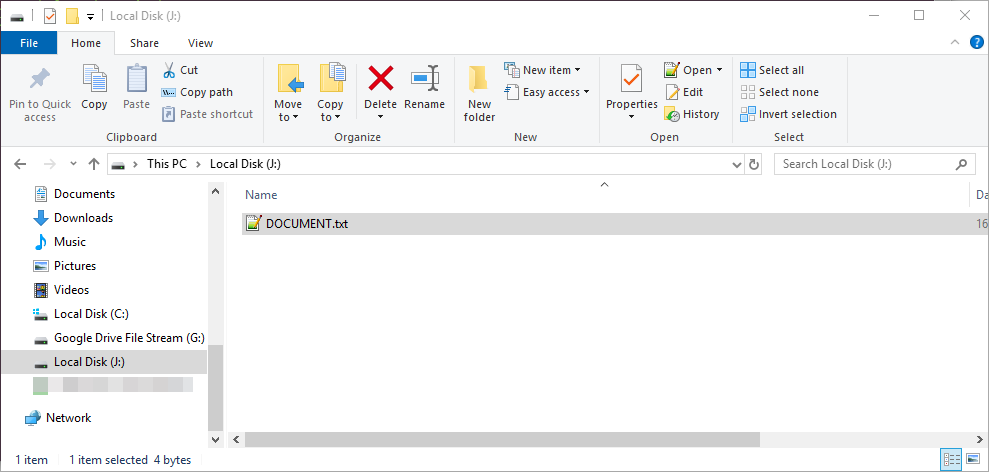
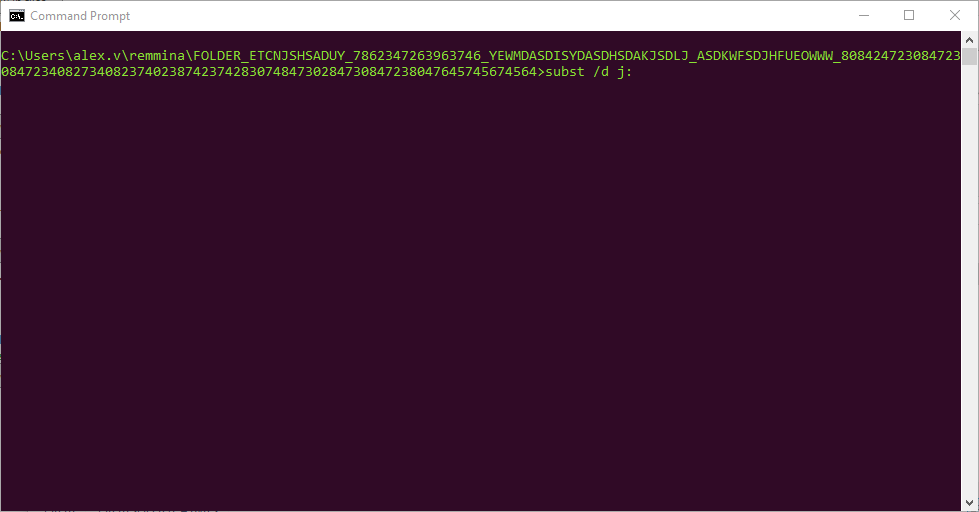
- Return to your cmd window and type subst /d j: to remove the drive.
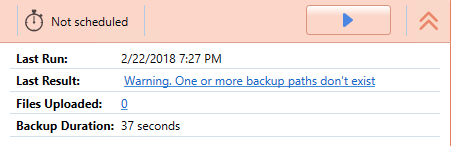
4 - One or More Backup Paths do not Exist
Errors occured:
- “Warning. One or more backup paths don’t exist”
- "ERROR: Warning. Access to one or more backup paths is denied".
UBS operates as a Windows service which is run under Local System account. At the same time, UBS agent and GUI operates under privileges granted to a user which started the application.
Why does that matter?
This approach has both, upsides and downsides.
Upside: Backup schedule start backup job/plan even if no users are currently logged on the server.
Downside: When configuring a backup plan in the application currently logged on users' privileges will be used to browse folders/drives/network shares. Backup agent might not have permissions to access all of the paths specified in the job/plan.
What is Local System account?
According to the article:
"It has extensive privileges on the local computer, and acts as the computer on the network. Its token includes the NT AUTHORITY\SYSTEM and BUILTIN\Administrators SIDs; these accounts have access to most system objects."
And considering the fact that most companies have password rotation policy that requires to change passwords every 2-3 months, changing the password and leaving our backup agent using the previous password may interrupt backup routine. Now imagine you need to change this password on 100+ machines at any given time. Thus, it's a bad practice to change Local System account to any other account with Administrator's privileges.
By default, Local System account has access to all files on a local computer/server, but often when a server's role is a file-server the permissions for shared folders are being adjusted and System can be deleted from accounts who are granted to read the data.
To make sure that the backup service is running under Local System account you can go to C:\Windows\System32 and locate the file services.msc and double click on it, locate the service and see the account that is used there.
In the agent, on tab “History”, filter by “files” and in the list you’ll find which files have been skipped.
Reporting the error to our support team allows us to check the file path and provide you with more help
- ERROR: Warning. Access to one or more backup paths is denied.
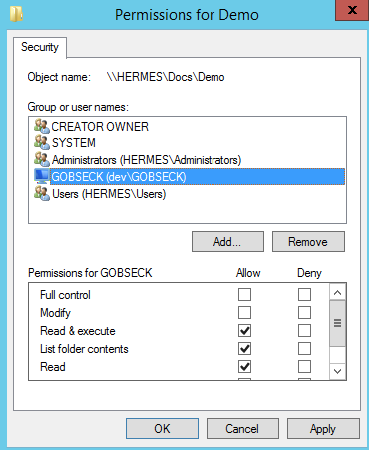
Check permissions. Please refer to 5.2.1
- Warning. One or more backup paths don’t exist.
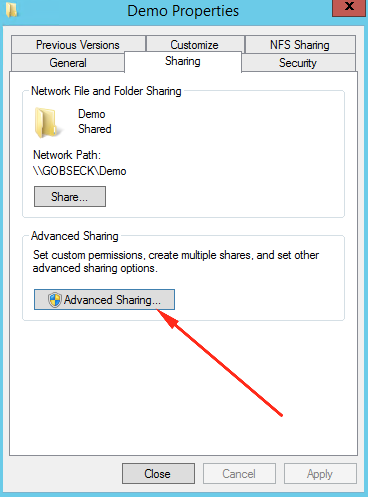
The resource is not accessible via the network, you need to configure sharing properly. Please refer to 5.2.2
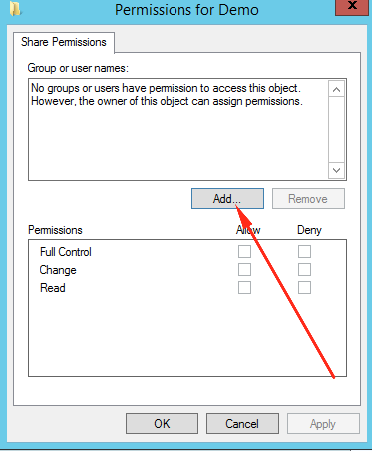
There are 2 ways to provide permissions to access data
5.1 Provide account credentials that have access to the resource. The easiest way is to provide credential in the backup wizard:
Please note that if there's a password rotation policy requiring passwords change it may affect backup process.
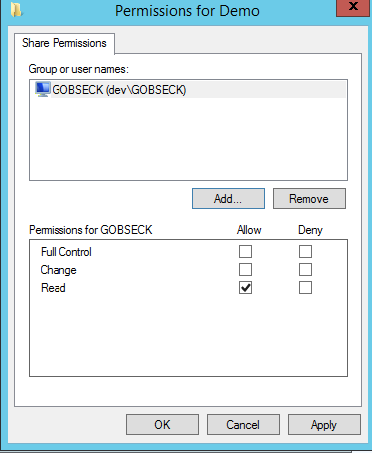
5.2 The best way to provide access to allow backup app to back up data is to properly configure permissions on the destination.
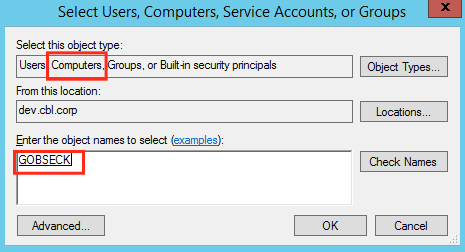
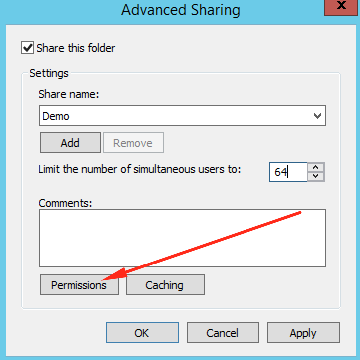
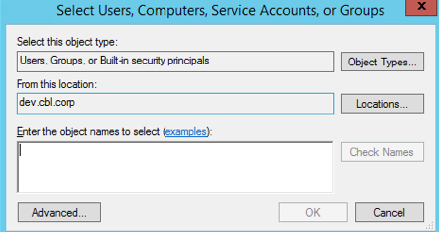
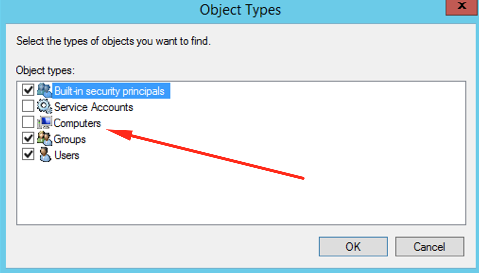
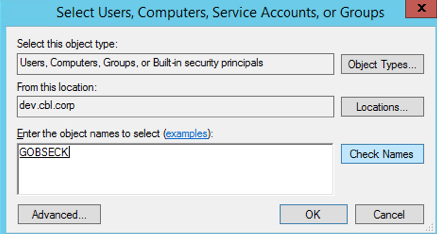
5.2.2 Now we need to configure sharing:
5 - Warning. One or more backup paths do not exist (Other Causes)
Your backup job run as scheduled. But by some reasons you received the notification with the message: “Warning. One or more backup paths don’t exist”.
You set up the backup plan, select files/folders that you want to backup on the source step, saved backup plan and go ahead. But then, by some reasons, some directories/folders/files have been deleted by someone. And just don’t exist. Therefore, the software can not find them.
Users might not backup only local files. Documents that located on network shares can be in the list. So, make sure that the account under which the service (UBS service) is up and running and/or the PC itself have enough rights to backup files that selected on the source step.
By default UBS service is up and running under Local System Account. Commonly, this account doesn’t have right permissions for backing up files.
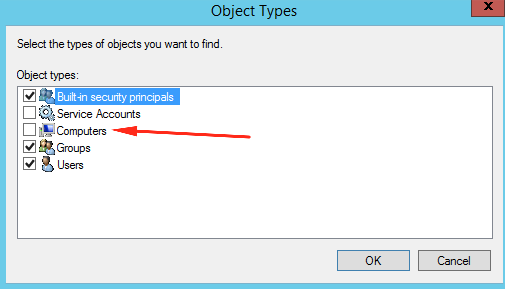
Local system account is a computer record. Therefore, if you go to the file/folder security options - you can add your computer there and re-run backup then.
How to determine which paths are no longer exist:
- check your diagnostic information (log files). Probably should be switched in High level
- in the agent, on tab “History”, filter by “files” and in the list you’ll find which files have been skipped
- liaise with our support team or solutions architects
6 - How to Increase Upload Speed
For backup duties, the data transmission speed is a key performance indicator. USB provides users with efficient data transmission tools but in some cases backup processes can be slowed down. This article guides you through backup speed slowdown issues and the measures that help to avoid them.
Most Windows users use firewall and anti-virus software. In some cases, firewalls and anti-virus applications can cause data transmission slowdown by limiting bandwidth and preventing long-time data transfers. At first step, check if UBS is whitelisted.
UBS splits files into 10 MB chunks by default to upload it to storage. The chunk size is adjustable. The overall backup performance can be improved by adjusting chunk size with an approach as it is equal to the file size, as it is shown in the diagram below.

In fact, this is a heuristic value as chunk size (or N x chunk) must fit approximately 70% of files. Thus, in backup there will not be many chunks of small sizes, i.e. 21.5 MB cannot be split efficiently to 7 MB chunks.
For example, if the median size of a single file of your backup plan is 17 MB, you should adjust chunk size to 18 MB to optimize the process. However, consider recommendations of point 2.
For backup plans that contain files of smaller sizes, small chunks are recommended; for greater files big chunks. are recommended, respectively.
Mind that the RAM consumption may grow significantly in accordance with the formula below: RAM consumed = 2 x thread count x chunk size
The principles of network connection are also a thing to consider.
For a Gigabit connection, 10 MB chunk size could be too small (provided it is not set because the files are very small), so it is recommended to set it 120 MB or alike.
If you are using a modem connection (satellite or cellular), then the minimum chunk size of 5 MB is recommended.
Note that your host connection bandwidth is likely to be used by multiple processes on multiple machines. So, instead of theoretically possible bandwidth, it is reasonable to use the expected available bandwidth for upload speed estimation.
It is important to adjust thread number to use network bandwidth and CPU in a most effective way: too many threads may create a significant load for both network and CPU and decrease overall performance. Too few threads will reduce the uploading speed respectively.
If a network connection is not stable, smaller chunks and smaller thread count work better. For small files backups, bigger thread number and smaller chunks will be more efficient. For big files and middle-sized files, it is recommended to use the default number of threads (6 in Backup for Windows, 5 in Backup for Linux and Mac) and chunk size adjusted as described in the paragraph above.
For improving overall performance it is reasonable to exclude files of smaller importance from your backup plan (or include important files only). Use backup filters to manage your backup content.
One more option is splitting the whole dataset to several backup plans.
For example, images and videos do not change frequently, so they can be backed up on a monthly basis.
On the contrary, MS Office documents may change several times a day, so they can be scheduled for a daily backup plan [ *doc; *docx ] files.
In addition, you might never want to backup any temporary files. Thus, exclude (or don't include) all [ *tmp; *temp; ~*; *.bak ] files from all plans.
7 - VSS Error 8229 from Event Logs During Virtual Machines Backup
Problem
Sometimes when the backup for Virtual Machines is initiated, you may face the following error:
A VSS writer has rejected an event with error 0x800423f4, The writer experienced a non-transient error. If the backup process is retried, the error is likely to reoccur.
Generally, if you check the Event Logs, you'll find there the following eventID: 8229.
This EventID and error means that it's not possible to create a snapshot for the specific Virtual Machine. To fix this problem you need to perform the following steps:
Open Hyper-V Manager

Open Hyper-V host and select virtual machine causing error

Right-click VM > Settings > Management tab > Integration services
Disable Backup (volume snapshot) Service

Click OK
The machine will be in 'saved' state for a short period of time when you're not using 'Backup (volume checkpoint)' option and the uptime counter could be reset.
To run the backup with this option enabled, check eventlog on the Hyper-V host - it will contain warnings/errors pointing to the particular machine causing the issue.
You will need to check the event view log inside of VM(s) specified and implement corresponding fix to resolve the issues - This is quite common when an SQL server is running
8 - System Time Issues
"The difference between the requested time and the current time is too large" or "Your computer clocks are not synchronised". These errors often occur when users computer system time is not synchronised properly. Amazon returns an error code if a request does not come in a certain time interval.
To Resolve a System Time Issue
- Open Control panel.
- Select Date and Time
- Click Change time zone.
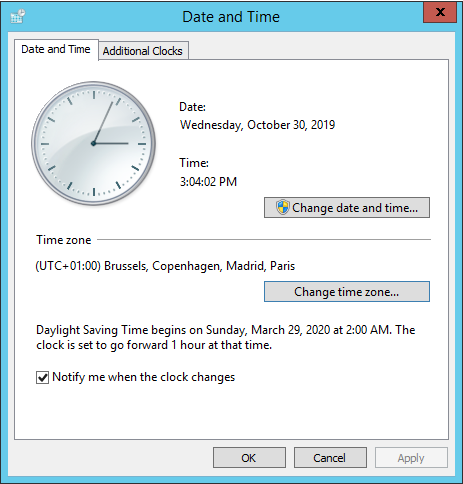
- Set the timezone that suits for your current location. In case the same timezone was set before, reset it again.
- In Date and Time settings, specify the correct date and time.
You can also re-syncronize net time using the following command:
w32tm /resync
9 - Access to one or more backup paths is denied
Warning message: Access to one or more backup paths is denied In case this warning message is displayed once the nackup plan is finished, it generally means that the Backup service is not granted with sufficient privileges to access and transfer objects to a backup destination.
Enabling Use Backup Operator option usually resolves this issue.
Solution 1
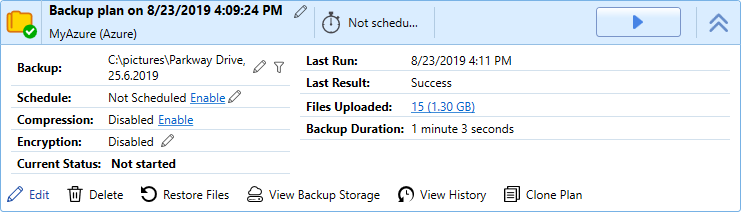
- Run UBS
- Switch to the Home tab.
- Find the backup plan that reported the Access Denied warning, then click Edit.
- Follow the Backup wizard steps to the Advanced Options step.
- Select the Use Backup Operator check box. This enables the application to back up objects regardless the specified permissions.
Solution 2
- Open the backup plan which produced the Access Denied error, then clikc Edit.
- Follow the backup wizard step to the Backup Source step.
- Exclude files and folders which have been displayed.
- Once you are done, click Next.
- Follow the wizard step to save the backup plan configuration.
Solution 3
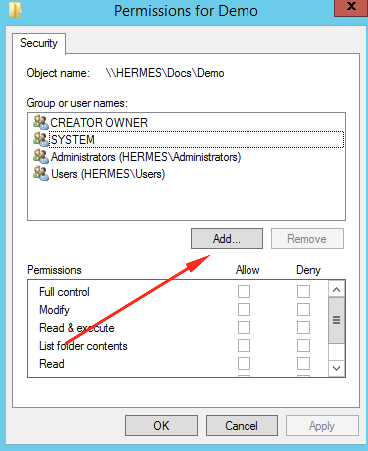
- Find files or folders which have been reported in the Access Denied error description, then open their properties.
- Switch to the Security tab, then click Edit.
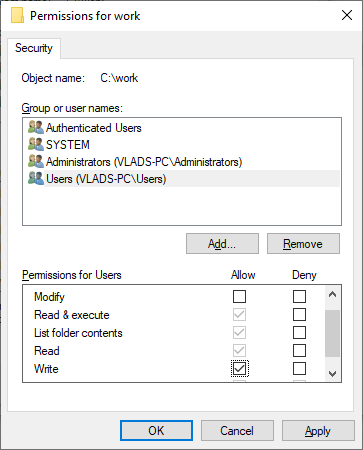
- Specify the proper access permission, then click OK or Apply.
In case you do not have enough privileges to edit file and folder permission, contact your system administrator
10 - Device is Not Ready
- Device is not ready
- I/O error.
- Operating system tries to use a transfer mode that the hardware device cannot use
- Input/output request number by operating system exceeds the hard drive capacities
- The hard drive is damaged.
- Decrease thread count
- Schedule backup plans for low load periods. Don't run the backup in high load hours (non-working hours are recommended).
- Open UBS.
- In the Tools menu, select Options.
- In the Thread count field, set 2.
- Click OK or Apply.
- Open the plan that produces these errors, then click Edit.
- Follow the wizard steps to Advanced options, then click Show Advanced Disk Options.
- In the Prefetch block count (0 without prefetch) field, set 50.
- In the Block size drop-down list, select 512 KB.
- Follow the wizard steps to finish editing the plan.
- Check S.M.A.R.T. status of the physical drive that is backed up. For example, you can use this tool: http://hdtune.com/
- Use the standard Windows tool chkdsk. To start the tool, open the console, then run the following command: chkdsk {drivename} /f, where {drivename} is a volume of the disk to be scanned
- Check your drive using Victoria For HDD: http://hardware-today.com/articles/hdds/victoriaperformanceevaluationtestingandminorhdd_repairs
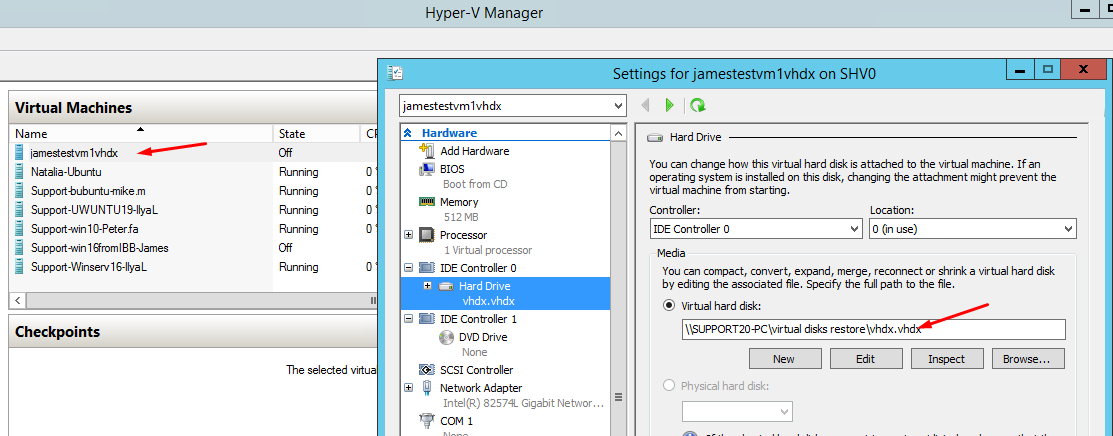
11 - How to fix the issue with the Hyper-V VM restore: ‘The file or directory is corrupted and unreadable
Since there are many different disk partition configurations, your configuration may differ from the one described below. Our task in this article is to describe how to solve one of the recovery problems that may appear. For the purposes of this article, we will consider the standard division of a physical disk into a boot partition and a system partition, since in most cases this is enough to start a new virtual machine. All additional partitions with data can be restored using separate restore plans and attached to the virtual machine after the main recovery process.

- Make a restore plan of the image-based backup with two partitions included from the cloud or local storage to a virtual disk in VHDX format. One of the approaches to do this is from the Backup storage tab in the backup agent console. Right-click to open the drop-down menu with the Restore option.
- Once the restore plan is complete and a VHDX file is created, you can spin up a new Hyper-V VM using the VHDX file you created.
In most cases, at this stage, you start this virtual machine and everything works just fine. Then you continue to recover data disks and attach them to this virtual machine.
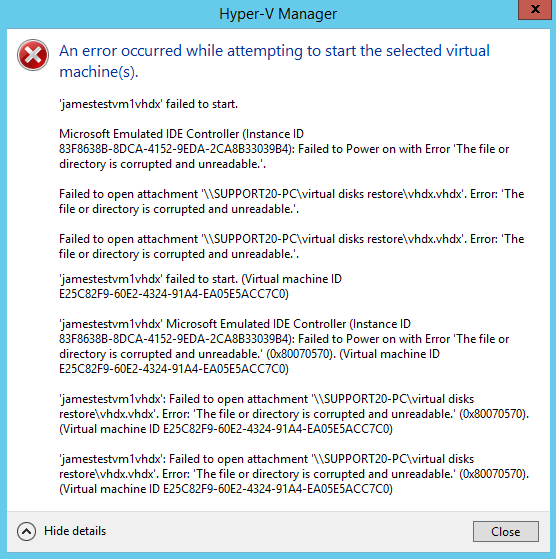
Fortunately, with a few extra steps, you can resolve this issue and start the virtual machine successfully. Following is what you need to do.
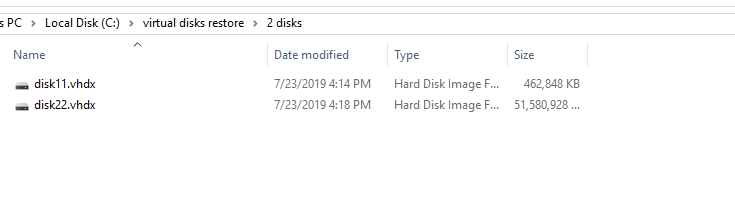
- Once the two VHDX files created, you can configure a virtual machine to use both of them. Make sure that one you are going to boot from the VHDX file you made from the boot partition (and not the other one).
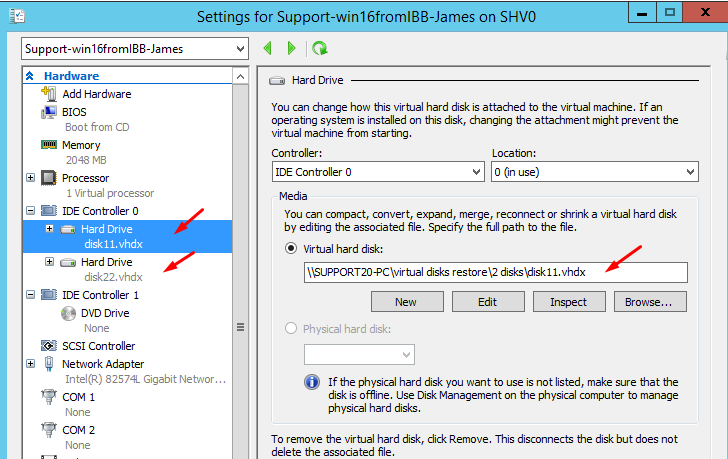
- With the configuration complete, you can start your virtual machine.
12 - SQL Backup - There is Not Enough Space on Disk
Error message: There is Not Enough Space on Disk
To perform MS SQL database backups UBS uses native SQL backup functionality. Within this framework, temporary files are stored in the default folder C:\ProgramData\OnlineBackup\MSSQL and are automatically purged once backup is completed successfully.
Once this error message occurs during MS SQL backups, it means you do not have enough free space for MS SQL backup temporary files on your drive.
To resolve this issue, you can either free some additional disk space on your volume (C: by default) or change SQL temp file location.
To Change the Temporary Folder
- In the Tools menu, select Options.
- Switch to Advanced tab.
- in the Temporary folder field, specify the temporary folder for MS SQL temporary files, or click … to specify it via the standard Windows browse menu.
Related Articles
Unified Backup Solution - Key Features
Key Features Back up to a local hard drive and NAS-like storage devices; Back up Microsoft SQL Server and Microsoft Exchange data; Bare-metal recovery (create recovery disks and USB drives); Cloud Backup Image-based backup (back up disk or virtual ...How we keep your data safe
Encryption is everywhere: On your storage, on your network, over the Internet, and in the cloud. Encryption is about protecting your data from those who might otherwise use it to cause harm. It protects you from those who bypass security to access ...UBS - Download Links
If you don't have access to the backup web console you can download our software using the links below Windows Backup - https://links.cloud4you.pt/windows-backup Windows HyperV and VMware - https://links.cloud4you.pt/vm-backup MacOS ...